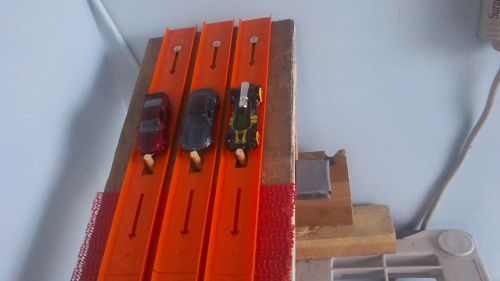
Homemade Undertrack Starting Gate
I made a really awful video of the starting gate I built.
You will find it here.
https://www.youtube.com/watch?v=o9x62ILBIYM
Any questions?
Sorry about the quality of the video.
Discussion
Yes thats why I made it. Thanks.
watched it 3 times... got any still pix
Yeah...very good design, and really nice...any diagram on how to build it?
Preacher
I WaS Wanting To Build Something Like That. Very Nice.
Pix and instruction coming soon...busy helping the wife. RL in the way again...

This is the starting closed and ready for cars.

Side view the the starting gate showing the handle, which is just a 1" x 1" piece I did not cut off of the trap door.

Now you can see the pegs that go up through holes in the track bed and one of the spring load cabinet hinges.

Pegs 2 inches long made from 1/4" dowling glued in place.

The hinges come in all kinds of types I used this type because I had them in my junk drawer.

Ready to race. Easier than a boxed starting line.
I made this in about an hour and I'm no carpenter. One tip is to mount the trap door on the bottom complete with hinges, then close the trap door and clamp it shut. Now drill your peg holes from the top through the track bed and the trap door all at once.. Then open the door and drill bigger holes I use a 5/8" bit. Then I drilled another 1/4" hole down track and used my jig saw to cut an egg shape hole using the 5/8" hole for the fat end and the 1/4" hole for the small end of the egg. this is to give room for the pegs to swing down and forward. All these measurement will have to be fiddled with depending on how thick of would you are using, the type of hinges you get and other stuff. I used the 1/2" plywood so it would match up with the hinges I had and it's lighter and stronger than 3/4" boards. Any questions or observations let me know. Have fun and Larks lead!!
Awesome!! This looks super easy to make and works great!
ingenuity in action !


Nice job! Looks to run real smooth. Nice thing about this type of gate vs a box is it's easier to load and you can see the cars better.