
How to photograph diecast cars
Modifying your cars for the race track is a joy in itself but once you get your custom creations made, it never hurts to show off your hard work. Taking good photos of your cars is really easy with a few household items and a halfway decent camera…and these days even your cell phone might be all you need.
Easy and affordable
I take pictures of every Hot Wheels car I buy because I use those photos on the web site and on the Fantasy League game. My photos are admittedly very basic and serve no other purpose than providing a face to a name. Nonetheless, that’s a lot of cars so I needed to have a process that was quick and easy but resulted in some decent quality shots. After a little online research I learned that I only needed a few things:
- A cardboard box or hobby foam board
- Duct tape or packing tape
- Utility knife or hobby knife
- Desk lamp and a white light light bulb
- Some notebook paper or tracing paper is even better
- Printer paper or colored construction paper
- A tripod or some sort of camera stabilizer
- A digital camera with a macro lens or setting
Making a light box
Creating a light box is incredibly easy and can be done for free using stuff you’ll find around your house. You can buy light boxes online that are bigger and do a lot more but I’m cheapskate so I took the easy way out.
First thing you need is a cardboard box. Cut the flaps off so it has one end open and place the box on its side. Your car will sit inside the box, your camera shooting inward.
If you'd rather have something that is all-white (which helps), you can take some foam board from Hobby Lobby and make your own box. Just measure and cut squares then tape them together leaving one side open. A cardboard box was my first lightbox but I have since used foam board and it works great.

Next, cut a hole in the top of the box. Measure 2-inches in from the edge and then cut out the square. Then take some notebook or tracing paper and tape it across the hole you just cut. The paper diffuses the incoming light, giving your car more uniform coverage and less direct light. Since this paper is a diffuser, the type of paper makes a difference.
You need paper that is thin enough to let light through but not so thick that it blocks it. I’ve found that tracing paper is perfect. Ruled notebook paper is typically pretty thin too so if you can’t get tracing paper, rip a few pages out of a notebook. Printer paper is probably too thick but you can give it a try if that’s all you have.

Once your box is ready, you need some light! Your light source should be above your box shining down through the tracing paper into the box. I use an old aquarium light fixture with a white light bulb and sit it on top of my light box. You can use an arm lamp or any other type of lamp as long as you can put it above your box…the type of lamp doesn’t really matter…what matters more is the bulb. A white light bulb will produce the best results compared to the normal “yellow” bulb you usually buy for your house. You want your light source to be a close to sunlight as possible so the colors of your car will look good and true.
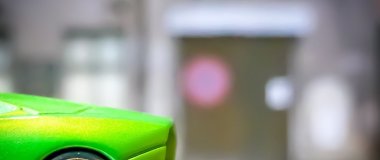
To finish your light box, you need a background for your cars. In my case, I just need a simple white background. Some people have colored backgrounds and even printed out scenes that can look really cool with a car. If you’re looking for a “showroom” style photo (like I do) then you want an “infinite” background of a solid color.
To achieve this look, just take a sheet of printer paper and tape it long ways from the back of the box to the floor of the box, bending it into the corner. That’s it…you might need an extra sheet depending on the depth of your box. I have also used colored construction paper and newsprint as backgrounds when photographing white cars. White cars on a bright white background doesn’t always show up well, so a slightly tinted background helps show more detail. Of course, you could use black construction paper and that would really make the white and yellow cars really stand out…depends on how you want your cars to look. Try using other colors and see what you like the most.

Photographing your cars
Once you have your light box built you’re ready to start shooting pictures. I use a short tripod and a digital camera to photograph my cars. Put your camera on the tripod and place it maybe a foot away from the center of your lightbox where your car will sit…you’ll have to adjust things based on your camera, zoom level and so on. Be sure to use the macro setting if your camera has one. The marco option is designed for shooting small things up close and will focus on one thing while blurring out surrounding objects, which is just what you want.
The last step before you take your first shot is to turn off the lights. The only light source you want on your cars is the white light of your lamp coming through the tracing paper. Other room light or sunlight can change your photo…but that’s not always a bad thing…it just depends what you want your photos to look like. Again, play around with your lighting to see what effects you like the most.
Honestly, at this point the quality and style of photos is entirely up to you and your camera. Every camera is different and you could probably even use your smartphone to shoot decent pictures these days. I’m not going to tell you how to use your camera, but with your light box and white light, you have a great foundation for getting good photos. From this point it’s just trial-and-error until you get a result you like.

Polishing your photos
Last but not least, sometimes you’ll need to edit your photos. Most of the time this will be something simple like cropping or resizing your image. You don’t need Photoshop or some other expensive software to do these simple tasks. I often use the web site Pixlr to work with my photos. Pixlr is web app that lets you upload your photos and edit them quickly. Pixlr has a bit of a learning curve but once you play around a bit you’ll be able to make quick changes to your photos…and it’s FREE.
Think outside the light box
A light box is a great tool to have when you want to get nice photos of your cars, but sometimes you don’t want a conventional setting. If you’re looking for something different and more fun way to show off your cars, take them outside and shoot them in different locations. Take a photos in your backyard, your garden…take them to the park or down by the river, or how about the sand box? The possibilities are endless and only limited by how much effort you want to put into it…but even if you’re lazy, any photo of your cars is better than no photos. You don’t have to have fancy cameras and equipment to have fun and show off your cars…just make sure that when you do snap some shots to share them with everyone here at Redline Derby. Be proud of your hobby and have some fun.
Regardless how you photograph your cars or what style you use, once you have something you're proud just make sure you share your photos and post them here at Redline Derby for everyone to see.
Discussion
While the box build here still works great, I have since modified my photography station a bit. Here's the write-up on that one.
http://www.redlinederby.com/topic/super-easy-photography-station/2370
Awesome write up, may try this out