
My 'Sweet 16' Redlines build thread
https://www.redlinederby.com/media/img/ab708fce.jpg
https://www.redlinederby.com/media/img/1abf6c31.jpg
https://www.redlinederby.com/media/img/6abbd69e.jpg
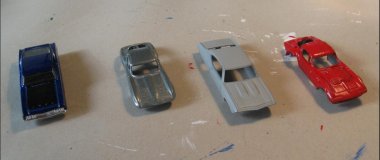
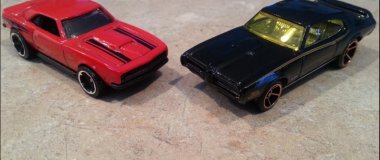
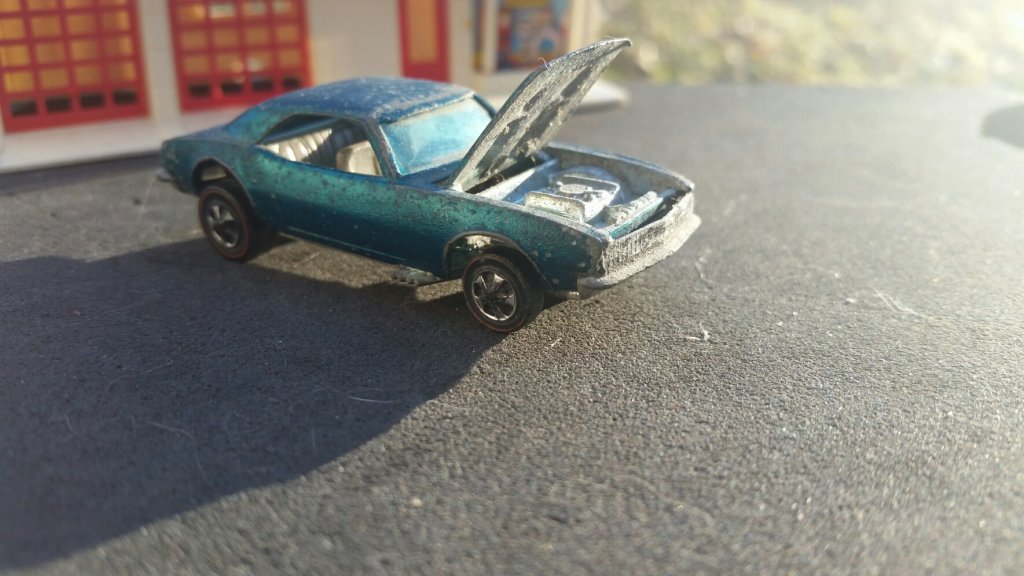
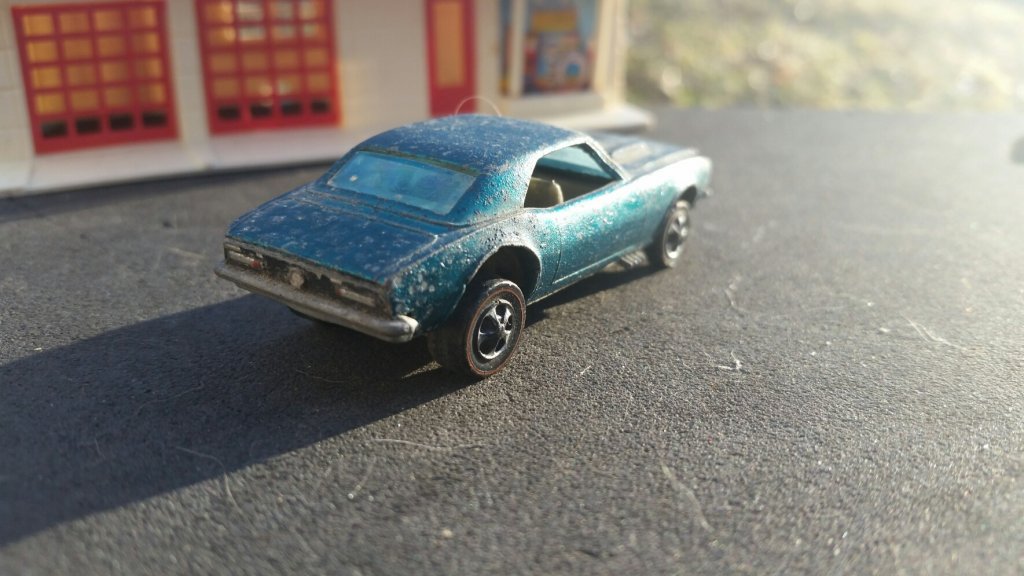
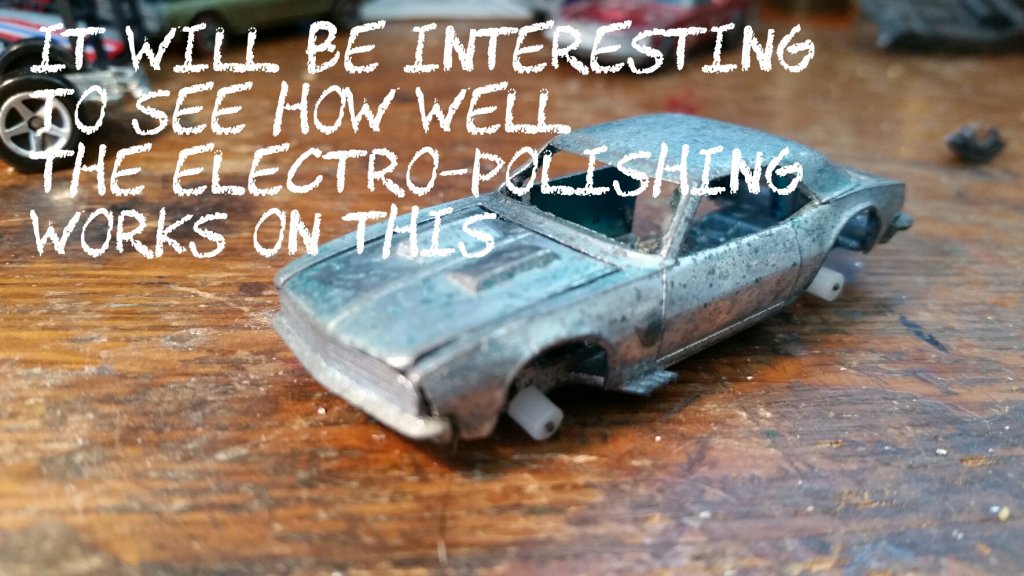
I took a few stylized 'before pics this morning of some of the cars I'll be working on in the weeks to come. The shots above are of the Custom Camaro that I'll be starting with.
This car is in the roughest shape of the four initial cars that I bought...and hence, was probably the most played with! Normally, I'd just throw some fte's on it, leave the 'patina' alone, and go racing. But, I've been wanting to put together a set of the first year Hot Wheels for some time. They came out in 1968 and are referred to as the 'Sweet 16'. There are US and Hong Kong versions of these cars and I'll be trying to use all Hong Kong cars.
This Camaro took a pretty hard hit in the left front corner at some point. The hood doesn't close properly, so, I'll have to do some body work as well as the usually repainting and repairing.
Before I go any farther let me give credit where credit is due. If you haven't seen 'Baremetalhw's videos on YouTube, you should really check them out...I will, mostly, be following his techniques. 'Redlineparts' is is a Great source for replacement parts, tools and Spectre-flame paint. And lastly, I've been dealing with the ebay seller 'original_redlines'...his name is Cage...to get my cars. It seems like I always come across great people when I'm working on my projects, and Cage has been great to deal with.
So, I'll go into depth with these builds...I might even post some videos once I get rolling. But, this weekend, I'll probably just be drilling and tapping the rivets and stripping the original paint. I'll be 'electro-polishing' these cars to get the finish ready...I'll explain that process as I go (and, I'll share a link to Baremetalhw video on the process as well)
Stay tuned, this will be a long thread. There's lots to do to these 50-year-old toys to bring them back to original...or, better than original...condition!
Discussion
I had some time, this morning, waiting for the wind to stop blowing so I could plow. So, I figured that it was a good time to get rid of the original paint.
https://www.redlinederby.com/media/img/92066317.jpg
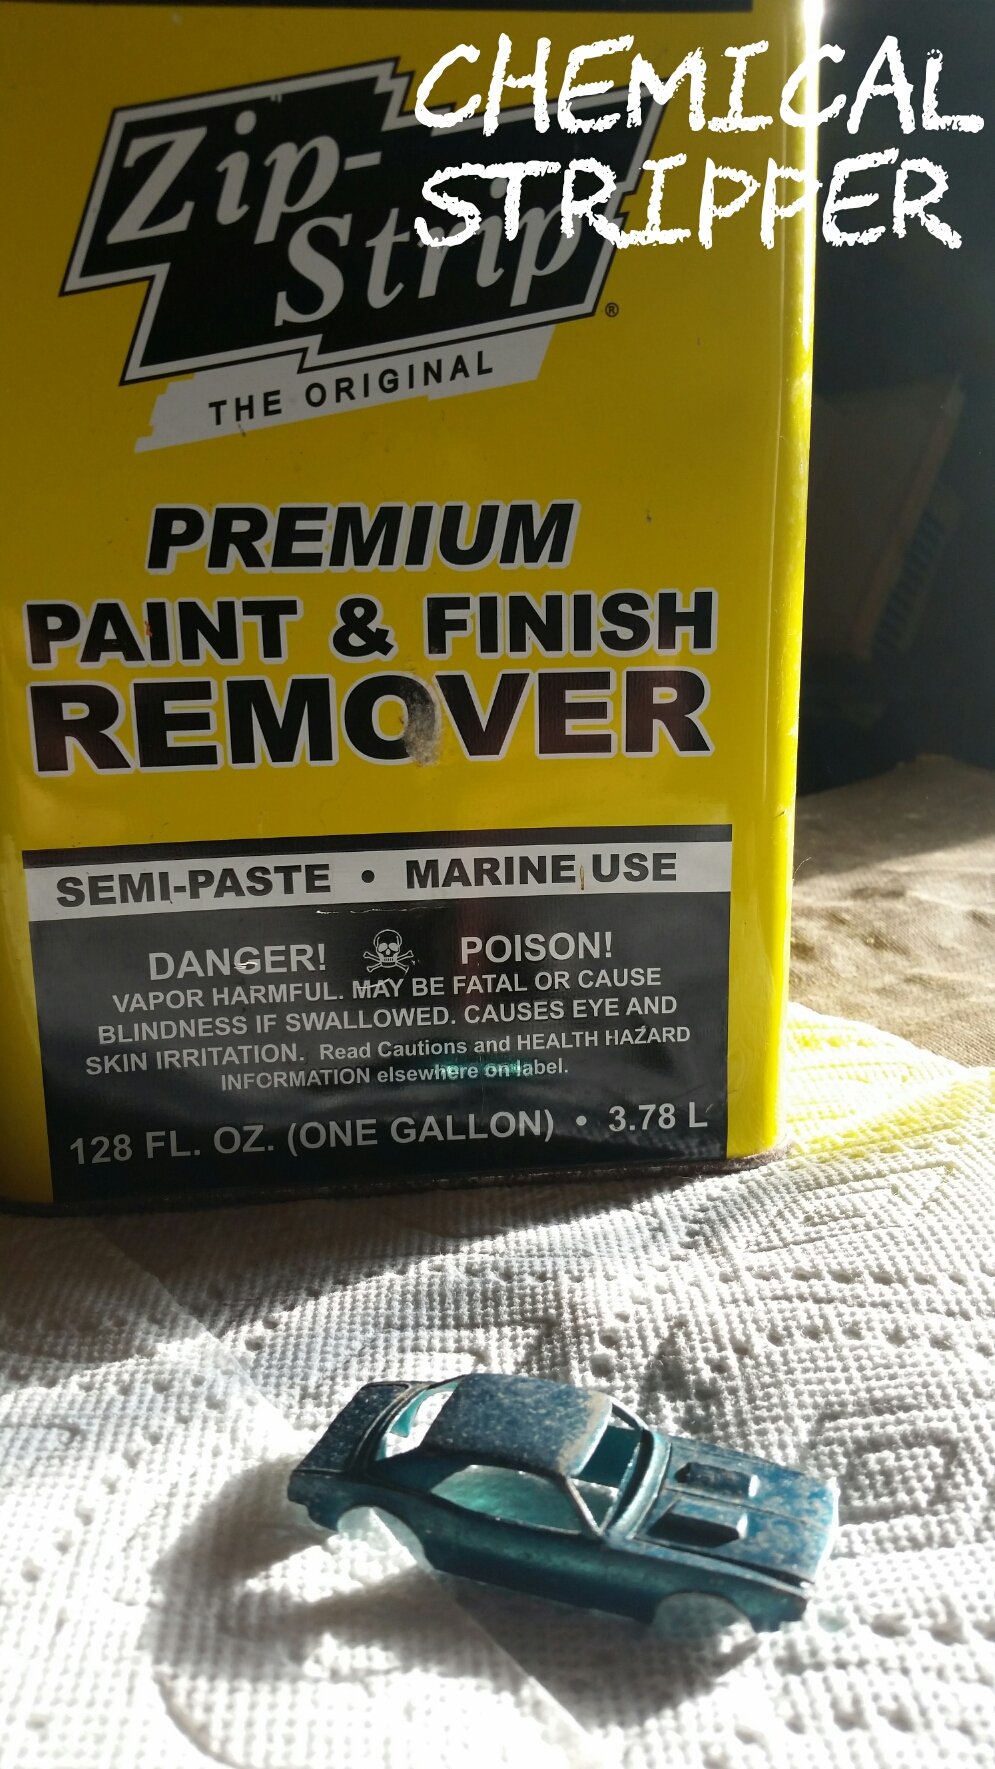
There are better paint strippers than this. But I have a bunch of cars to do, and I have at least half of this gallon still left...might as well use it up!
https://www.redlinederby.com/media/img/48301d70.jpg
Wth this stuff, I like to work in small areas and let it sit for a few minutes to work it's magic
https://www.redlinederby.com/media/img/0a0d355d.jpg
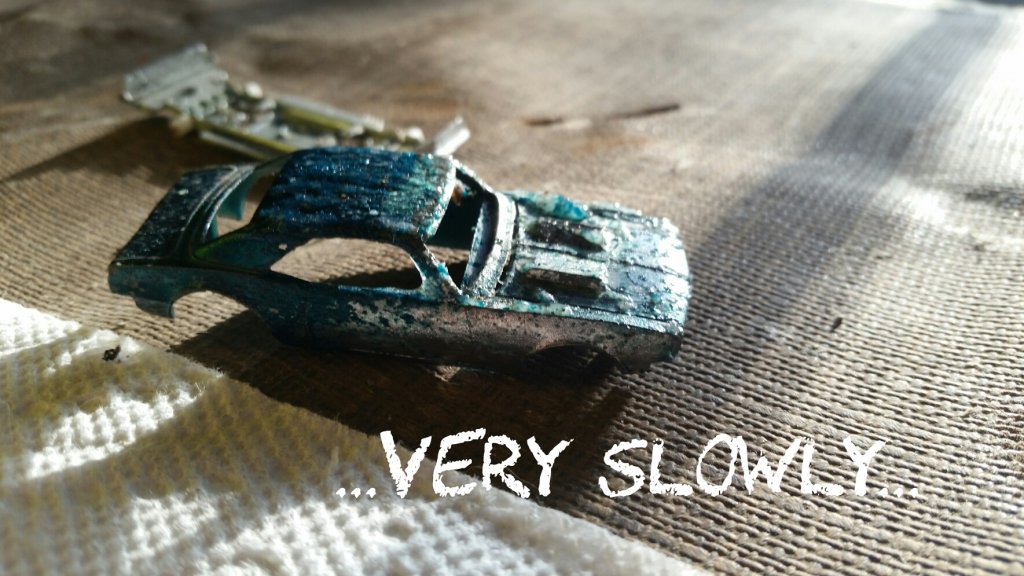
You can see, it takes several applications to get down to bare metal...the old paint is pretty tough stuff!
https://www.redlinederby.com/media/img/d0fb494c.jpg
I have an old brass metal brush that I use to remove the paint, once it has bubbled up. And don't be shy with the paper towels...the chemical stripper will burn if you get it on your skin, so take all of the necessary precautions.
https://www.redlinederby.com/media/img/6d60748e.jpg
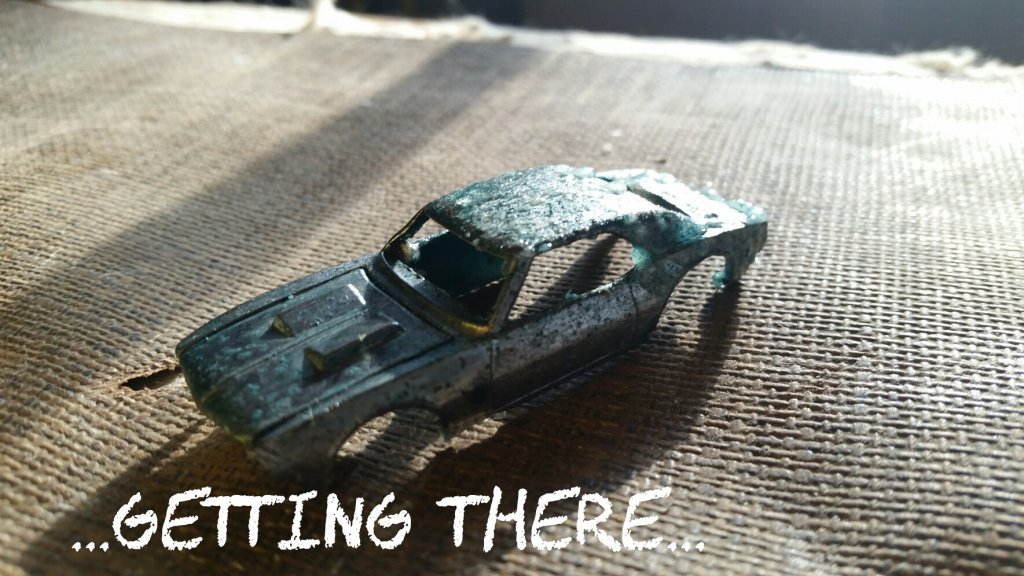
Once I have the front stripped, I start working my way from the back of the car. You don't have to be in a hurry with this. Removing the paint is just the first step on the body prep.
https://www.redlinederby.com/media/img/8852c165.jpg
Removing the paint revealed a lot of oxidation. I could get very aggressive with sanding paper and files, but that's not the way to approach these redlines. The metal was coated with zinc and it has a rather 'sparkly' look to it, that you can see through the paint. If you sand the metal too much, you will sand away the zinc coating.
https://www.redlinederby.com/media/img/99591957.jpg
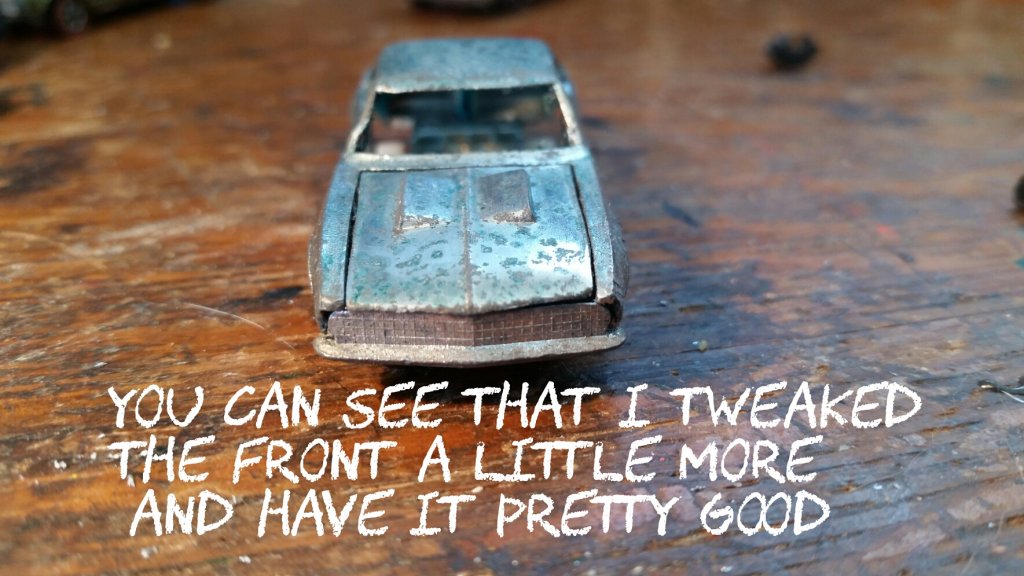
I took this time to play with the left front some more. It is pretty close to being good to go. I'm, actually, surprised that I was able to get it back this close. I'll spend a little more time with it before paint, but for now, it's pretty good
https://www.redlinederby.com/media/img/b833fcd0.jpg
The fits on the hoods weren't much better than this from the factory, so I'll just spend a little time on the edges of the hood, and it will be ready.
https://www.redlinederby.com/media/img/dd260be9.jpg
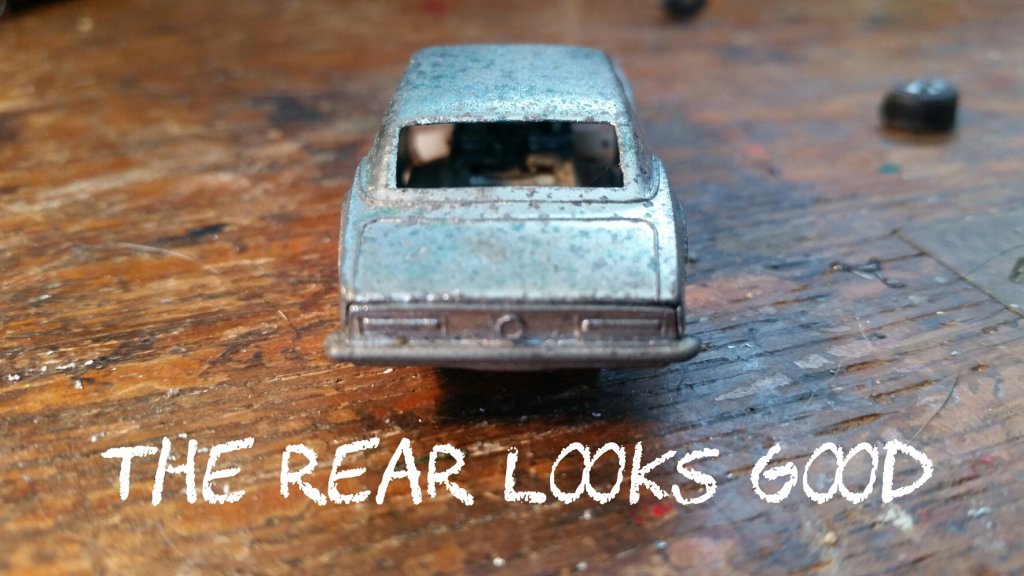
The rear of this Camaro survived the last 50 years relatively unscathed...and I'm sure that many an opponent had a good view of these taillights!
https://www.redlinederby.com/media/img/cac51731.jpg
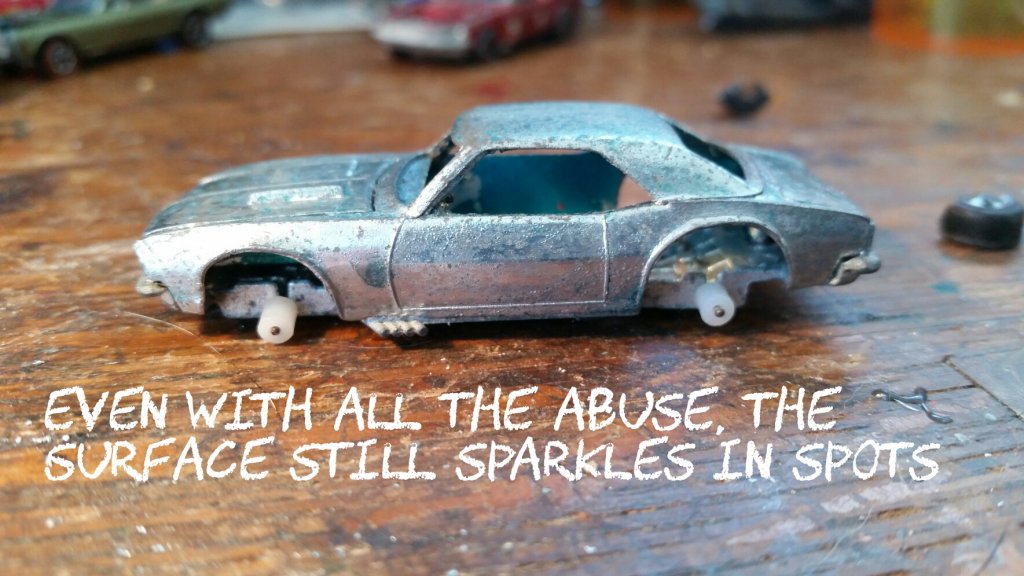
You can get a little sense of the 'sparkle' in the zinc with this picture. There is a spot behind the front wheel well where the zinc is missing. I'm not sure how to handle that just yet...I wait to see how it comes out of electro-polishing.
https://www.redlinederby.com/media/img/9aa10c4e.jpg
Here's a good look at just how cool these old cars are. You won't see many better models than this today, 50 years later. No wonder these toys were so popular when they came out...they were, and still are, pretty awesome!
Here is a link tO the Baremetalhw approach to electro-polishing...
I've got the phosphoric acid coming, so, I'll be ready to try this once it gets here. It it a similar process to what I used to do to anodize parts, so it shouldn't be too bad.
Speaking of which, anodizing might be fun to attempt to do to HW cars at some point...I'm just not sure the metal will accept the dyes. But, that's an experiment fot another day.
And the 2nd volume of the photo montage...
- Big Thanks for doing this and showing the how too!! — Rusty
- No problem...I enjoy doing stuff like this :) — 72_Chevy_C10
Tonight's installment is kinda 'common sense'...make sure everything in really CLEAN.
https://www.redlinederby.com/media/img/b2e31c5f.jpg
The original style axles are really pretty cool. I'm sure Mattel quite doing them this way for cost reasons, but they worked really nice. And, the axles can be removed by hand..no cutting, no grinding...just slide them out
https://www.redlinederby.com/media/img/9f5318df.jpg
The interior is in great shape...kinda an odd color for an Aqua car, but I'll leave it that way. These interiors are just like modern ones...the only difference is that the steering wheels are a separate piece...be careful of that.
https://www.redlinederby.com/media/img/494aa826.jpg
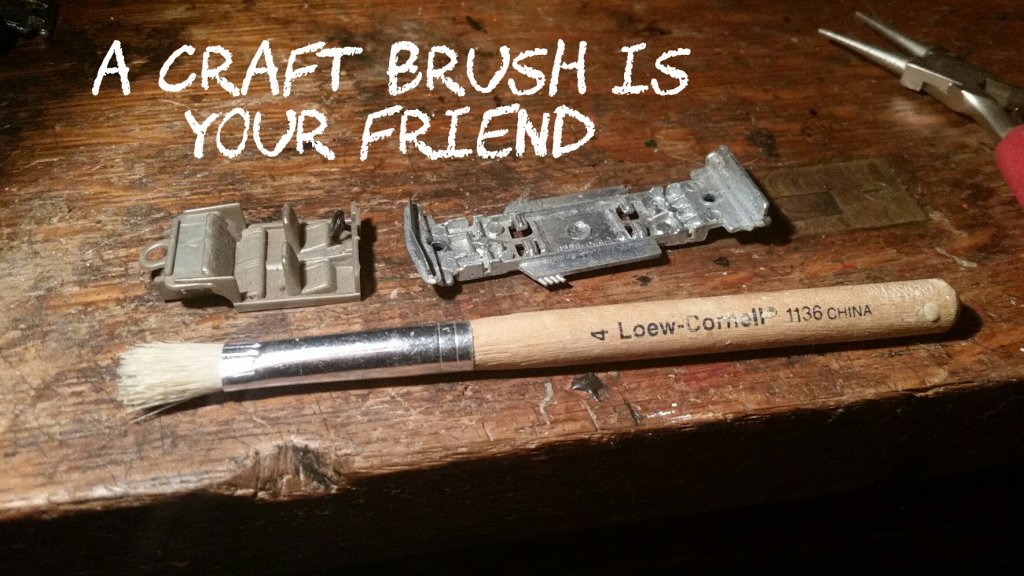
When you are in your local craft store, buy a bag of these brushes...they come in handy for lots of things. In this application, they are good for getting into all the little crevices.
https://www.redlinederby.com/media/img/932edc63.jpg
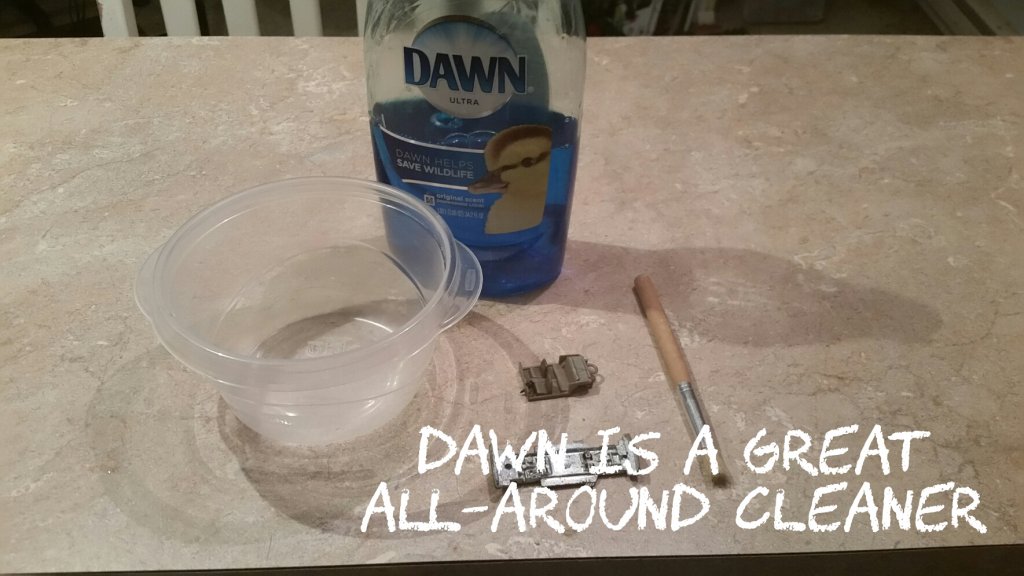
Soapy, warm water will loosen up the dirt that's been in this car for decades. Dawn is a nice mild soap that works great for cleaning just about everything.
https://www.redlinederby.com/media/img/71e37842.jpg
Again, don't be in a hurry...let the parts soak for a while. I cleaned my axles while the chassis and interior were soaking...give them at least 15-20 minutes.
https://www.redlinederby.com/media/img/04328963.jpg
I don't know how noticeable it will be in this picture, but, the interior, axles, and chassis are now nice and clean.
https://www.redlinederby.com/media/img/856d228b.jpg
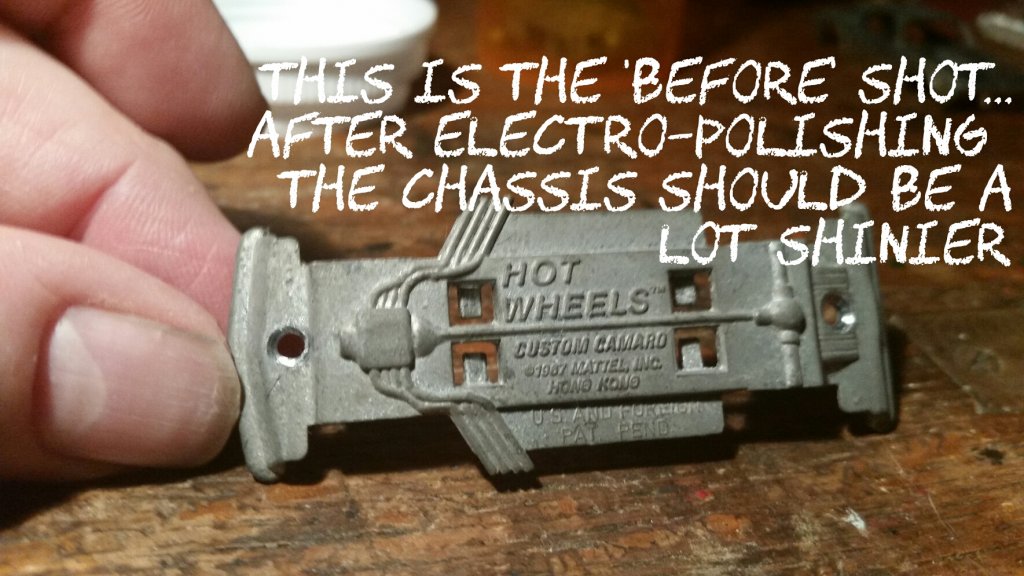
The chassis is dirt-free, but still a long way off from being ready for final assembly. It is rather oxidized, and I'm hoping that the the electro-polishing will restore the shine. But, that will have to wait til I have the phosphoric acid...hopefully, by the end of the week.
Until then, stay tuned!
You going different color or original?
- I'll keep them the original colors...I didn't strip the inside of the body and theRe is a fair amount of color still.in there — 72_Chevy_C10
Just one quick update tonght...
https://www.redlinederby.com/media/img/1ba4435c.jpg
I'll be knocking the dust off my airbrush skills with these builds. This is my Iwata HP-B duel action airbrush. It was a really nice brush about 25 years ago...and it just needs a little cleanup now.
A duel action duel allows you to control both the amount of air you are using (by pushing down) and how much paint is being applied (by pulling back). Cool stuff, but it's been a long time!
- Then can you airbrush me an RLD t-shirt? State fair style. ;P — redlinederby
- Years ago, yes! But, it's been a long time! — 72_Chevy_C10
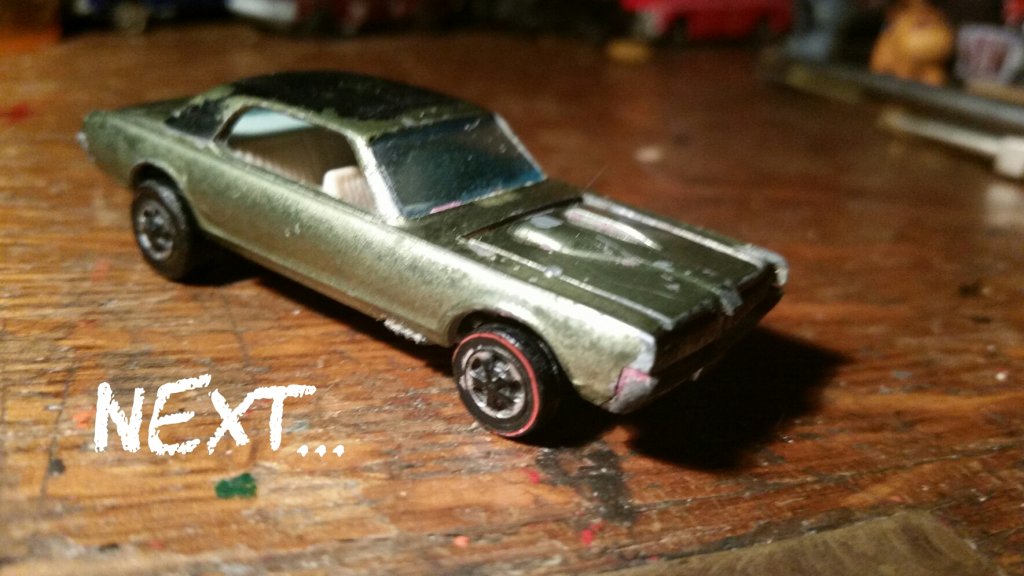
While I'm waiting on some supplies, I'll be getting started on this Custom Cougar...
https://www.redlinederby.com/media/img/1f4355cb.jpg
I had one of these when I was little...I think I painted it white with brown stripes! This one is pretty nice, the only fix will be the hood mount (one side is broke).
I won't be going through the whole process in this thread...probably just show before and after shots of the upcoming cars. They will all be going through the same process as the Camaro.
Oh, these cars came in the mail today...Deora and Fleetside... and a Flying Colors Stingray (one of my favorites from childhood)...
A quick update...
https://www.redlinederby.com/media/img/cf38a3e7.jpg
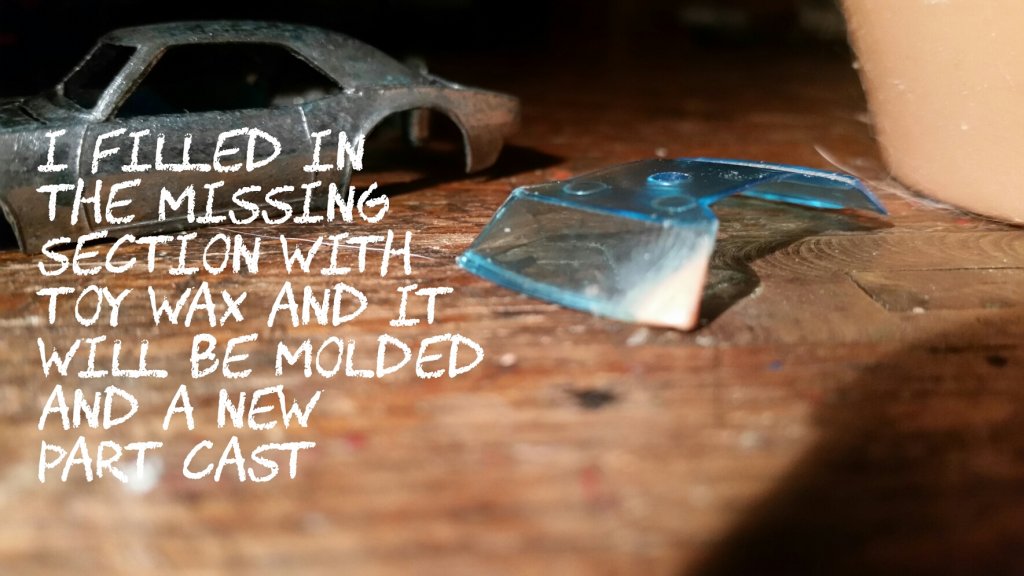
The windshield had a piece missing so I filled in the area with 'Hasbro wax'...a wax used in toy making. With this wax, you can get it very smooth, so I'm hoping the castings will come out well.
https://www.redlinederby.com/media/img/6e0c12e8.jpg
You can see the filled in area in the above picture. The windshield will be going under silicone today, so I hope to have castings this weekend
Another quick update tonight...
https://www.redlinederby.com/media/img/12df52bd.jpg
I drilled the Custom Cougar rivets last night, and I tapped them tonight. I also stripped the paint. This Cougar is in really nice condition...you can see the oxidation in the picture above, but I think that will come out without too much fuss.
I'll probably take the Custom Mustang apart next, while I'm waiting on the phosphoric acid...and, maybe, I'll get to spray some color this weekend :)
Okay, here begins the long process of restoring a 50 year old Camaro...
https://www.redlinederby.com/media/img/59678007.jpg
This car is pretty rough...lots of oxidation. But, these cars are starting to get pretty expensive... $33 in this condition....you will be paying $75 or more in nicer condition
https://www.redlinederby.com/media/img/30d19e29.jpg
But, it's a pretty sweet casting...and has been played with A LOT!
https://www.redlinederby.com/media/img/1642843d.jpg
And played with pretty rough
https://www.redlinederby.com/media/img/f25349ef.jpg
So, it's on to the dis-assambly. Start by marking the center of the rivet with a sharp punch
https://www.redlinederby.com/media/img/29c2826f.jpg
You'll want to order a Du-bro 2-56 tap and drill set. It comes with a 2-56 tap and a little drill bit that is the correct size for the tap...be very careful, they are very little
https://www.redlinederby.com/media/img/99e482db.jpg
Drill slowly, clearing the chips from the bit as you go. Drill down below the head of the rivet with the small bit
https://www.redlinederby.com/media/img/af24466d.jpg
Using a bit a little bigger than the head of the rivet, carefully remove the head of the rivet. Don't drill into the chassis, just drill deep enough to remove the head of the rivet
https://www.redlinederby.com/media/img/62086395.jpg
Using a thin tool...or your finger nail...pry the body off the chassis. Go slowly...that body has been on there for 50 years. Get one rivet broke loose and work the other one loose by moving the body up and down
https://www.redlinederby.com/media/img/6a0aaad9.jpg
Now, it's time to drill the holes deeper, being care not to drill through the body. Take your time! After drilling the holes as deep as you can, start running the tap down the holes. Go a turn and back it off, clearing the chips...and then go another turn. It takes a while, but it's worth it!
https://www.redlinederby.com/media/img/bf5b2e89.jpg
This looks really rough still, but the hood now closes. I'll refine the fit after I remove the original paint
https://www.redlinederby.com/media/img/20fb1ad6.jpg
This seems pretty brutal, but I'll be putting new, reproduction wheels on anyway. And, by cutting the old wheels off, the original nylon bushings aren't harmed in any way and should still work nicely.
https://www.redlinederby.com/media/img/7fc6b7df.jpg
Not too bad for about an hours work. The chassis is in pretty good shape and I'll need new (okay, different) window glass. A piece is broken off the original. I'll take the paint off with a chemical stripper, and then I'll mess around a little more with the front fender.
https://www.redlinederby.com/media/img/b0408d82.jpg
Just to help keep the parts organized, these big pill bottles are great!
Stay tuned for more to come. Electro-polishing, axle straightening, windshield polishing, paint, detailing, new wheels, and assembly still to come!